Overview
ACF’s Flexible Content fields allow you to create multiple groups of fields known as layouts. You can then use these to give content editors more control over how data is rendered.
In this article, I’ll give you a complete use case and show how you can leverage the Flexible Content field to create swappable site sections and integrate it all in a theme.
Think of Flexible Content as a way to make WordPress layout patterns, but with ACF PRO fields and subfields. Generally, the idea is to create atomic blocks, elements, units–or whatever you prefer to call the smaller pieces of UI–and compose them into whole flexible patterns. Ideally, these patterns are a starting point for editors to kickstart their content writing experience.
I’ve created a fictitious company site to demonstrate how to compose layouts with Flexible Content fields. Qorp is a new tech company that needs a site for its trendy new tech.
What is the tech? Nobody truly knows 🤪.
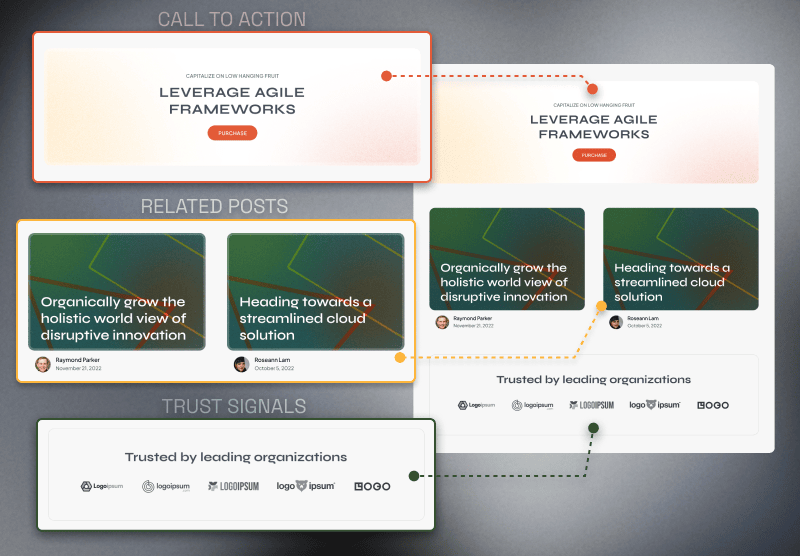
Qorp would like the ability to add and remove sections below their blog posts. Also, they want to be able to place them in any order. This is one example where Flexible Content fields can really shine. Below, I’ve included an image capturing the visual mixing and matching that Qorp required for their single blog posts.
There are three sections: Call to Action, Trust Signals, and Related Posts, all built with layouts created within a Flexible Content field. ACF makes it simple for Qorp’s content team to switch them around, add more of one layout, or remove them entirely if that’s what’s needed for a particular post.
Setting Up Our Flexible Content Field
The first thing we want to do is create a new field group with a Flexible Content field and give it a name. I named my field group: “Single Post: wrap-up sections” and my field “Sections.”
Next, make sure to set the Location Rules to Post Type – is equal to – Post. This ensures our fields only show when Qorp is editing a “Post” post type. Be sure to choose Flexible Content as the parent field type. I also recommend prefixing your Flexible Content field’s Name, e.g., qorp_post_sections.
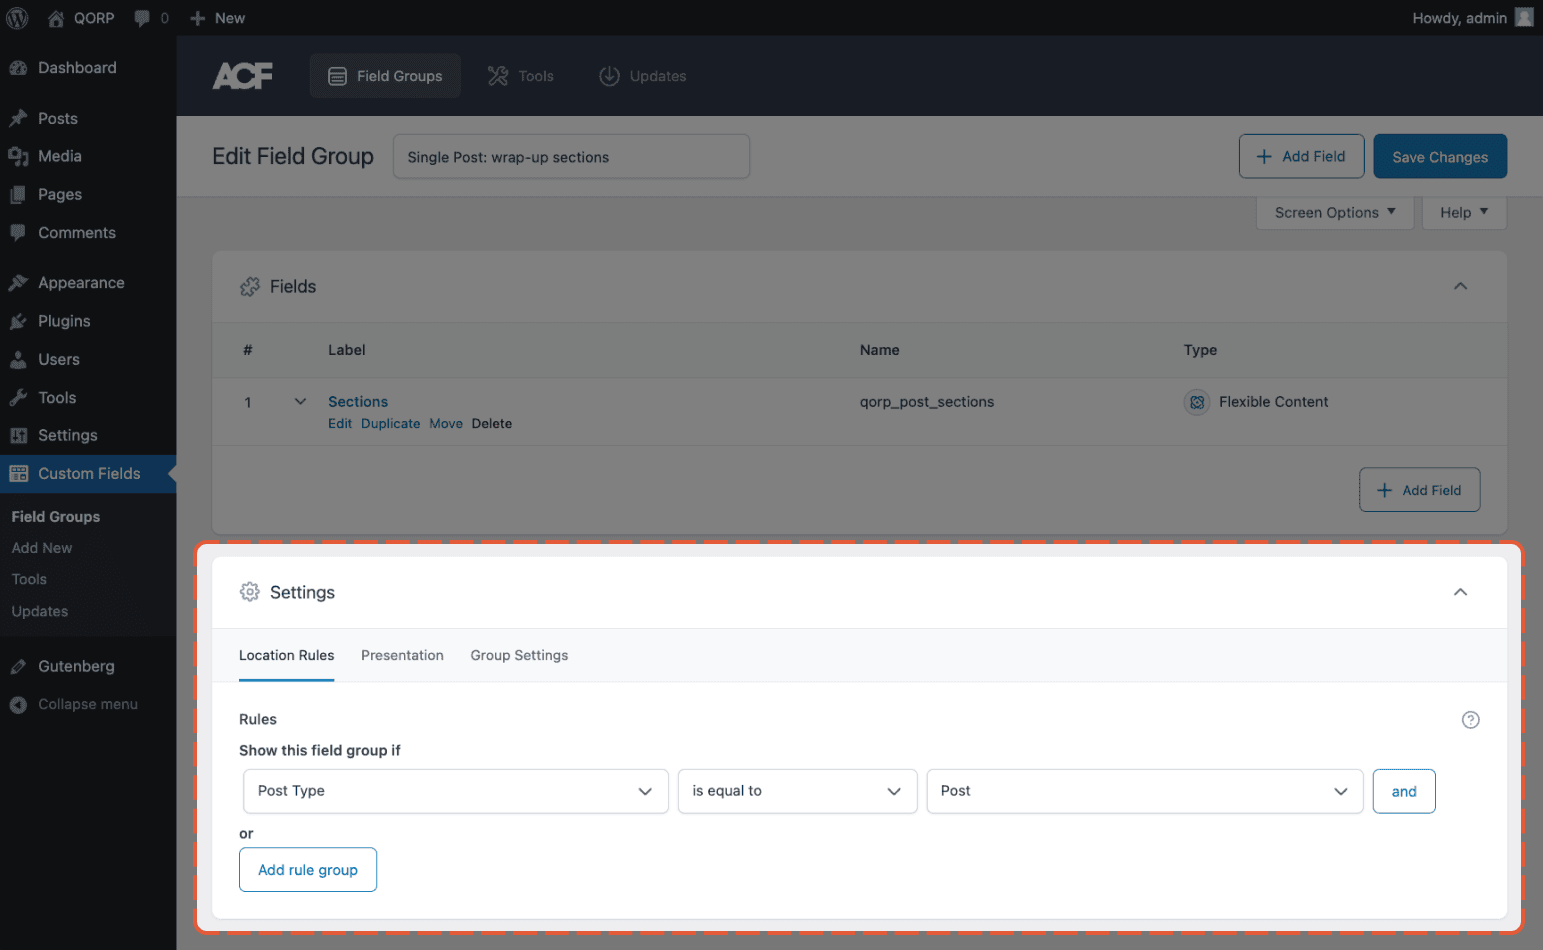
New Flexible Content field group with Post Type = Post as the Location Rules.
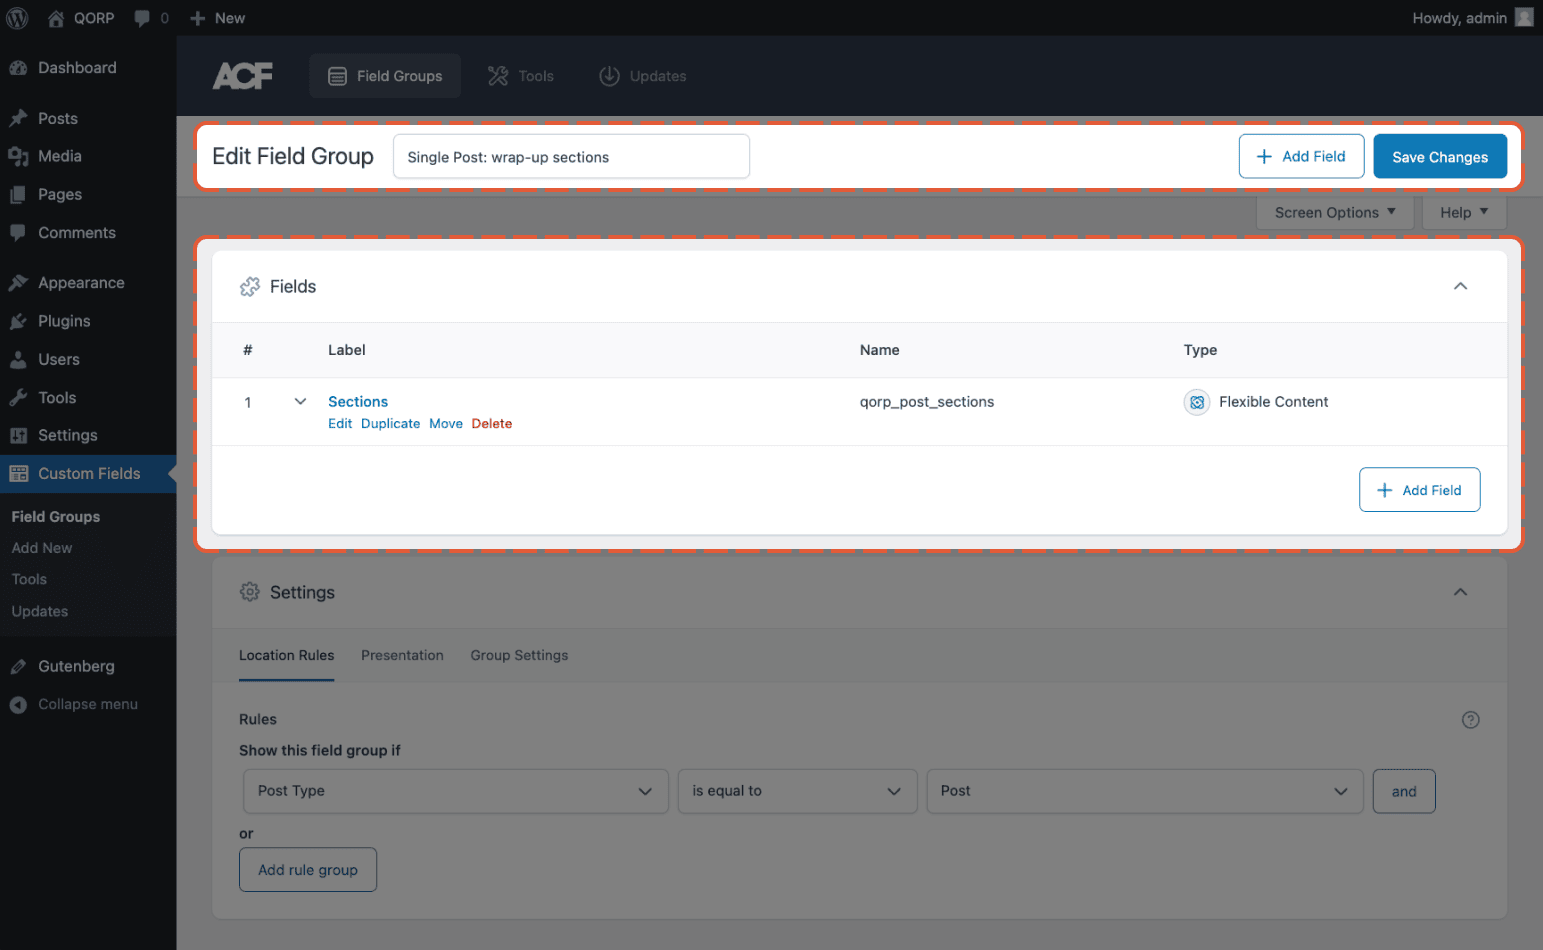
At this point, we’ve got our Flexible Content field showing for our Qorp content creators, but there’s nothing on the frontend yet.
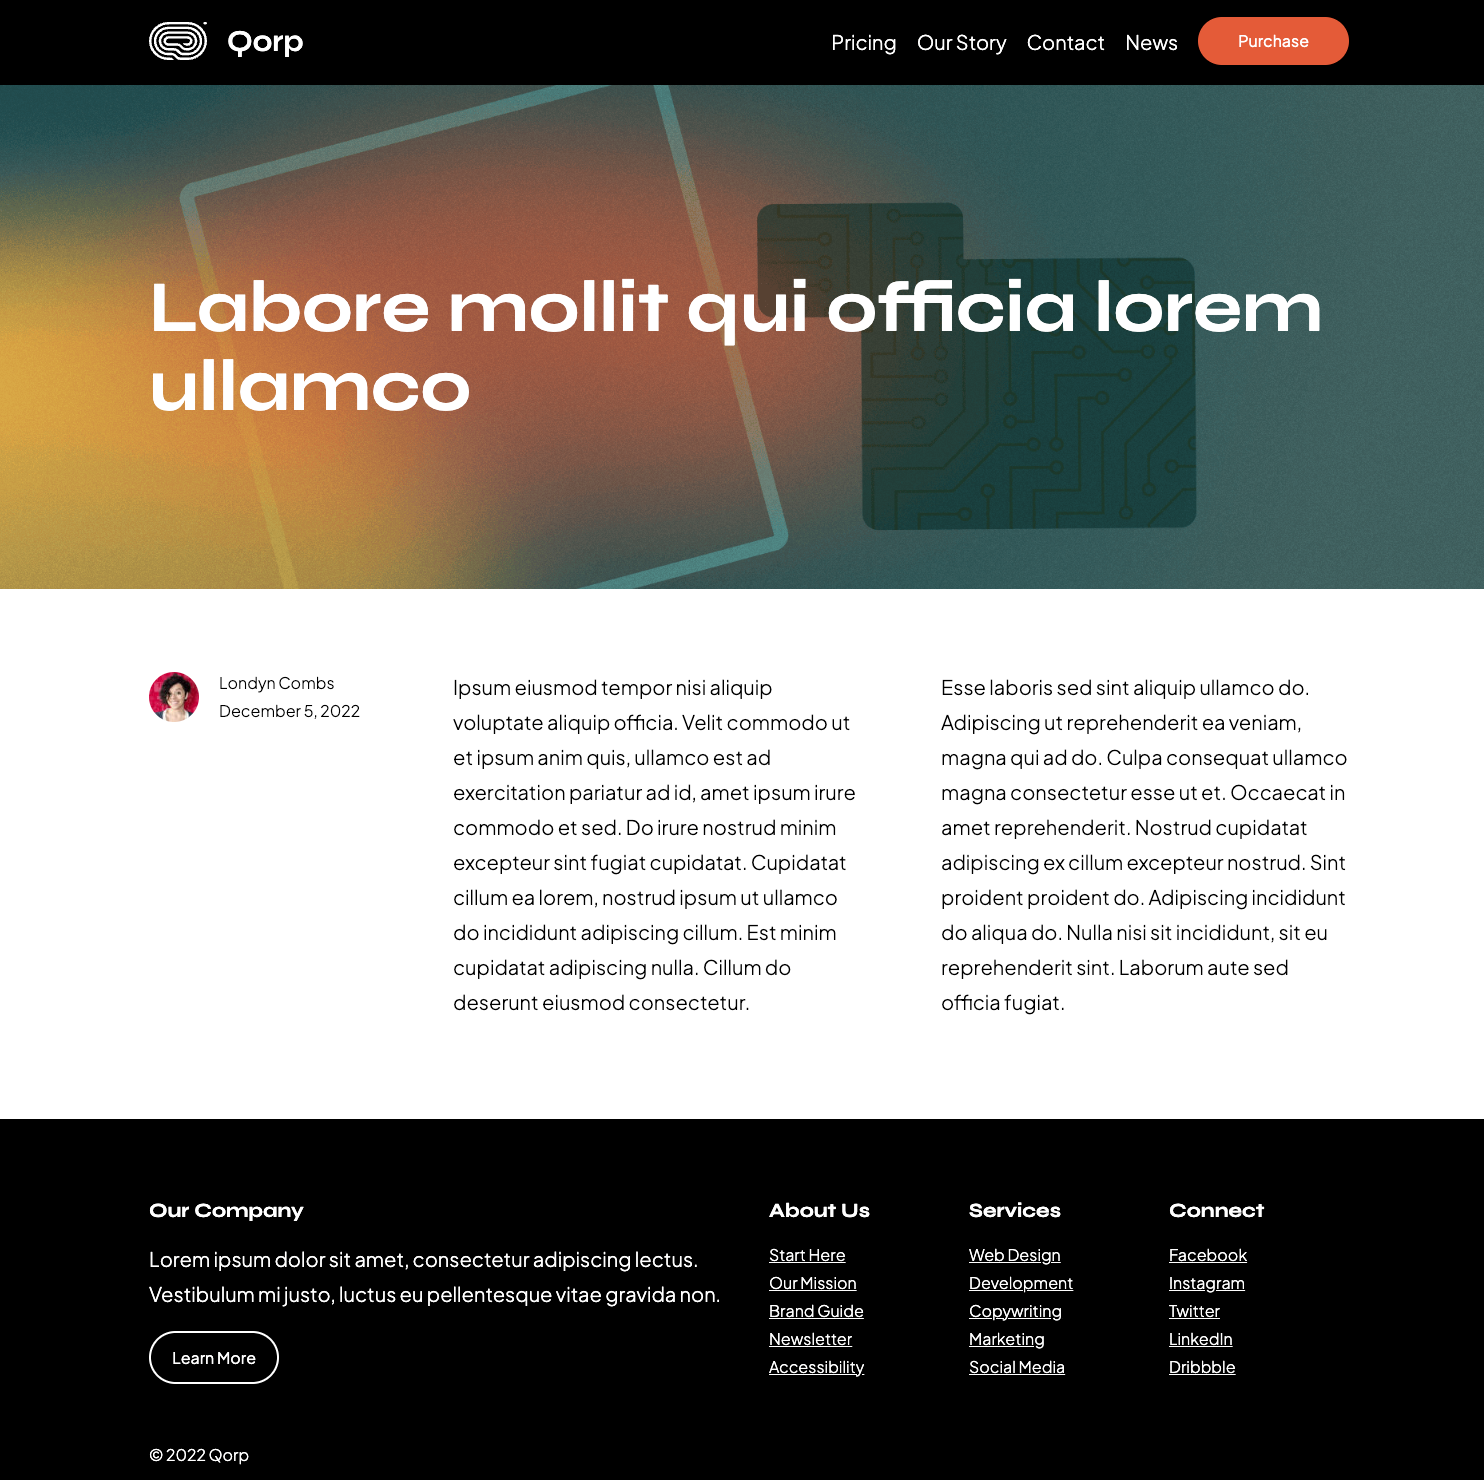
The Flexible Content field won’t do the client much good until we give them some layouts in the next section.
Creating Subfields Within the Flexible Content Field
Now that we’ve established our Flexible Content field, we’ll want to create our layouts. Remember, layouts are the nested field groups within a Flexible Content field which can be used to present the data differently for each layout.
Based on our design, we have the following sections we need to account for: Call to Action, Trust Signals, and Related Posts.
- Call to Action: This features a small descriptive text, often called an eyebrow, followed by a heading and a button.
- Label: Call to action
- Name:
call_to_action - Layout: Block
- Fields:
- Label: Eyebrow / Name:
eyebrow/ Type: Text - Label: Heading / Name:
heading/ Type: Text - Label: Button / Name:
button/ Type: Group - Button sub-fields:
- Label: Button text / Name:
button_text/ Type: Text - Label: Button link / Name:
button_link/ Type: URL
- Label: Button text / Name:
- Label: Eyebrow / Name:
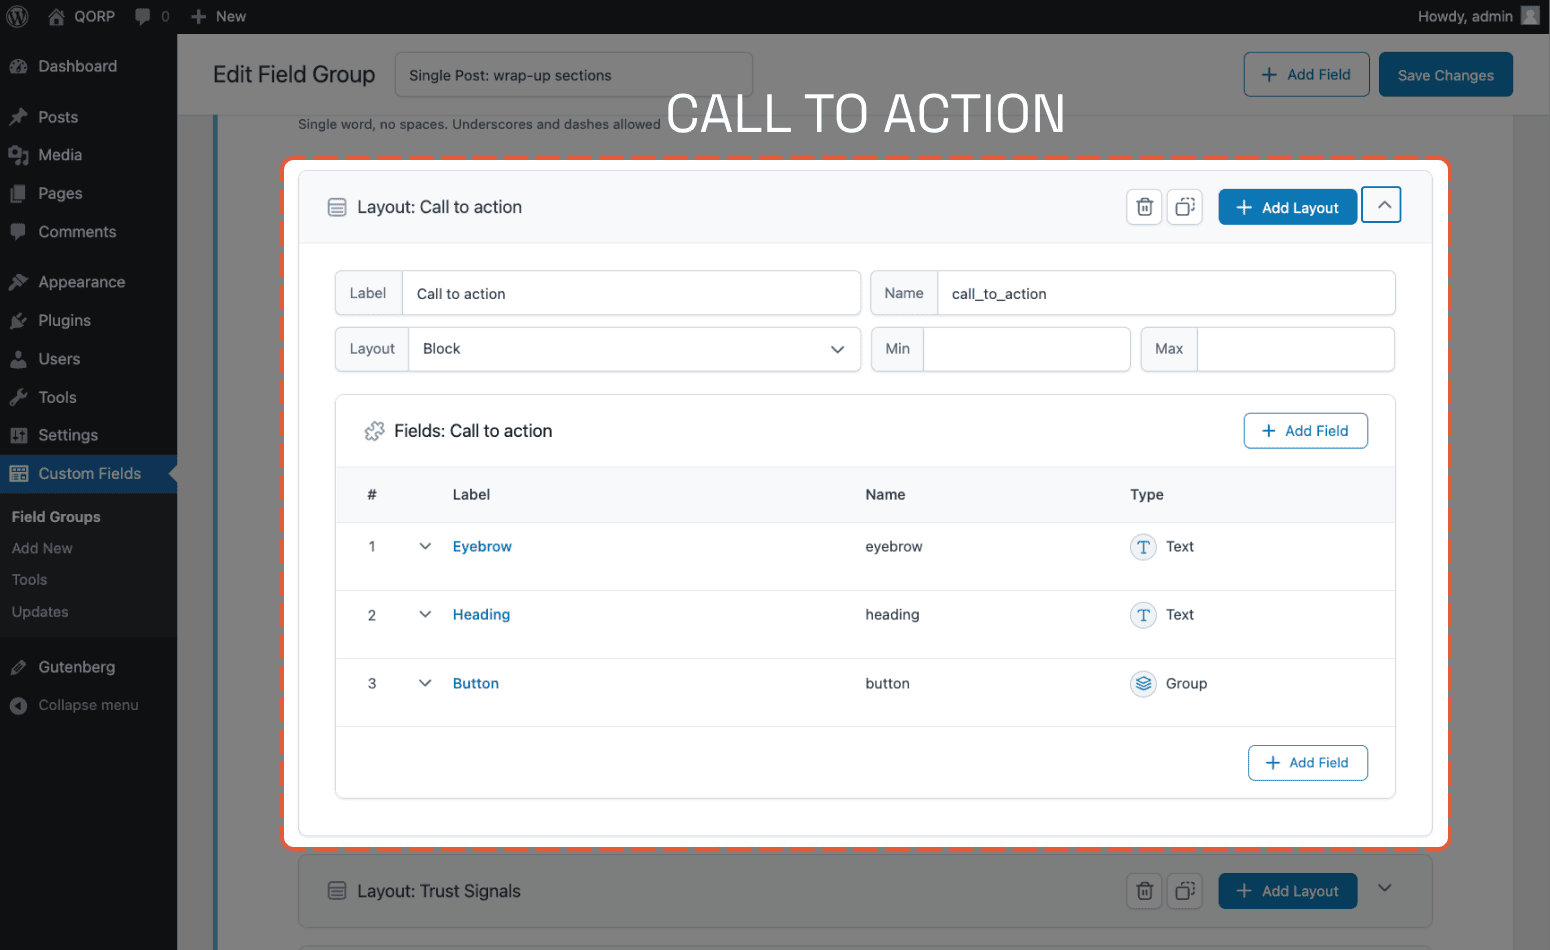
Since we’ve added our first layout, there’s something to see now when our clients look at their posts. There’s only one section so far, but we’re on our way.
- Trust Signals: A heading with affiliated company logos underneath.
- Label: Trust Signals
- Name:
trust_signals - Layout: Block
- Fields:
- Label: Logo / Name:
logo/ Type: Repeater - Repeater sub-fields:
- Label: Logo / Name:
logo/ Type: Image
- Label: Logo / Name:
- Label: Logo / Name:
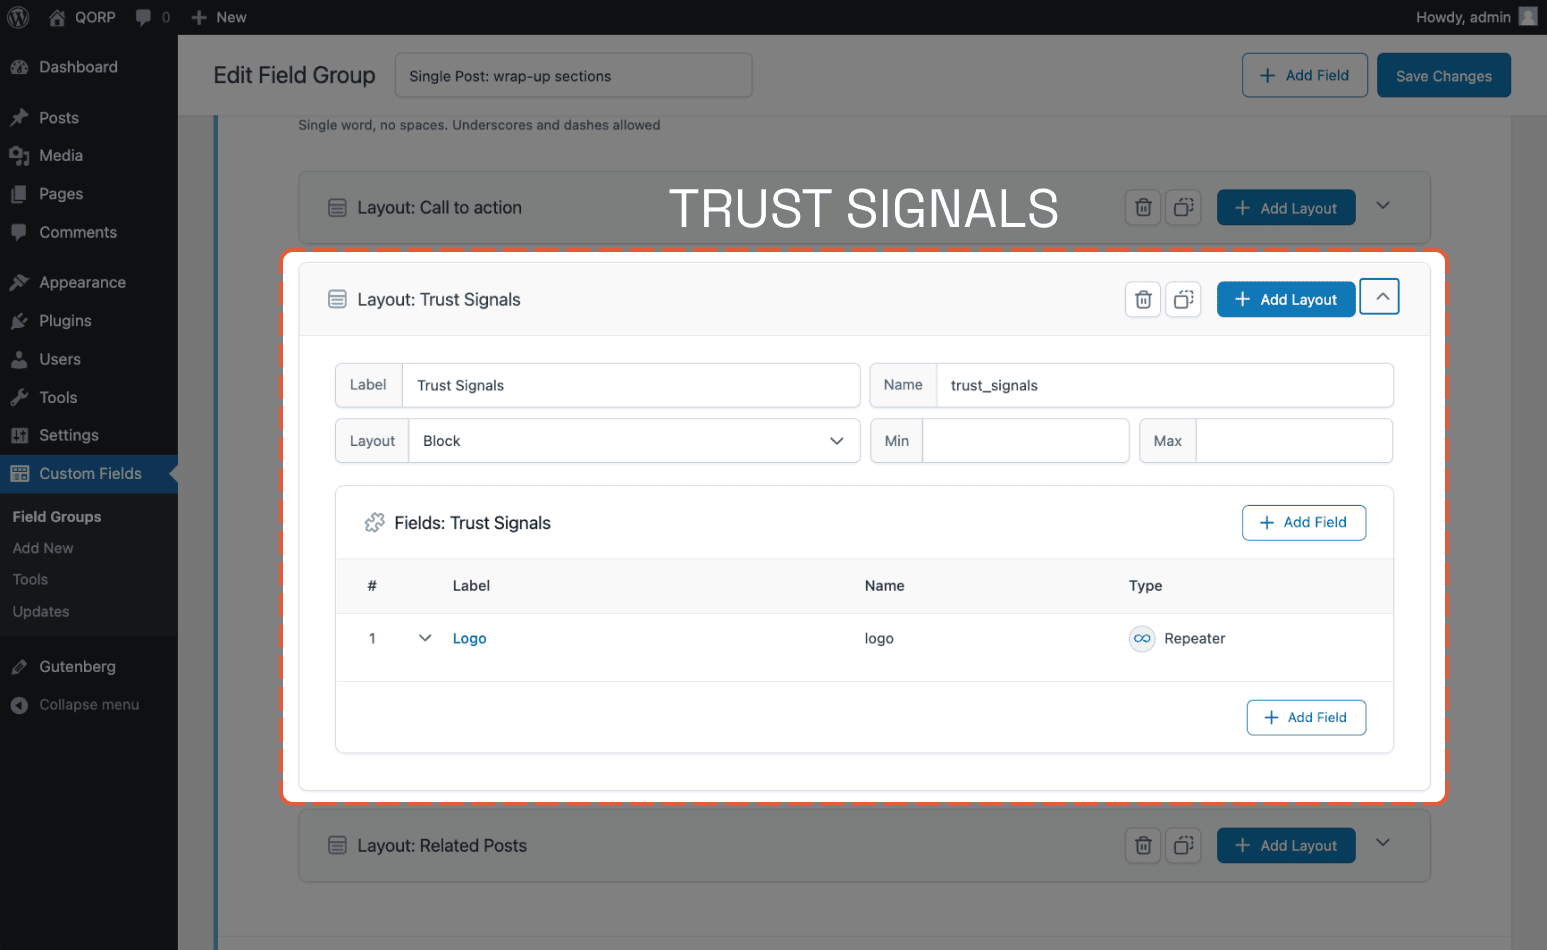
Now that we’ve added a subfield for the Trust Signals section, we can see it has appeared on our client’s posts beneath their CTA.
- Related Posts: Manually curated posts related to the current post, which the Qorp editorial team can set.
- Label: Related Posts
- Name:
related_posts - Layout: Block
- Fields:
- Label: Posts / Name:
posts/ Type: Relationship
- Label: Posts / Name:
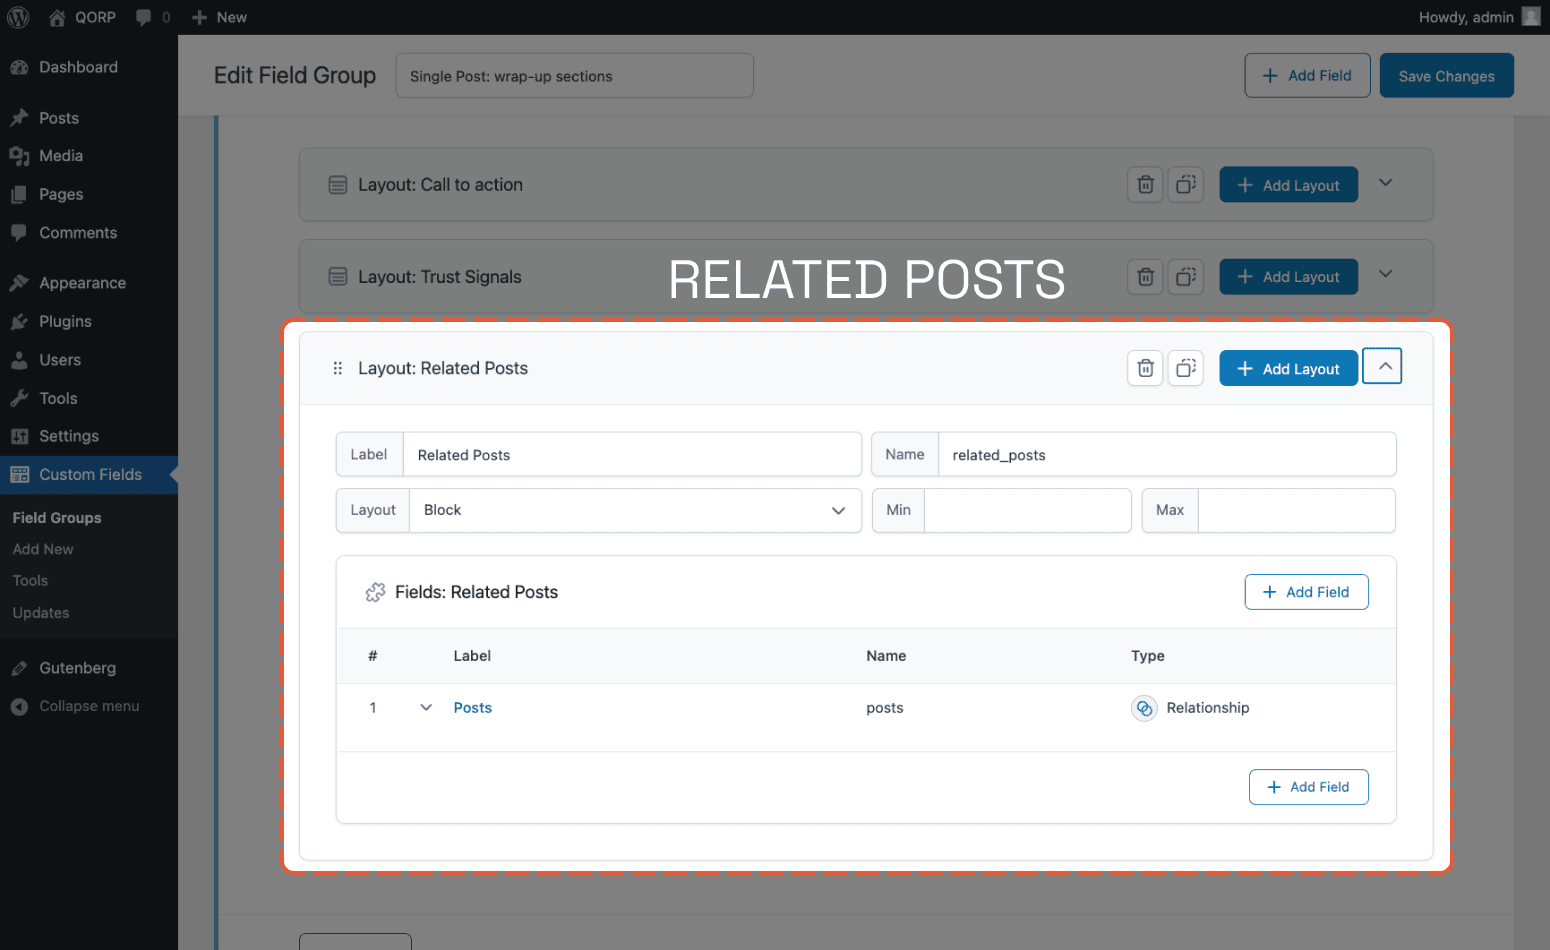
When we look at the frontend, we can see the Related Posts field displaying as it should.
With all of the layouts in place, our clients at Qorp can easily rearrange the layouts to suit the needs of the post.
Output Flexible Content Fields in a Block Theme
Next, we’ll walk through outputting the Flexible Content field data within a block theme. If you’re new to block themes, I recommend you check out “Introduction to block theme development“. WordPress is remarkable, as even block themes allow us to use classic template hierarchy and functionality. We’ll lean on these to output our post metadata. We can add a single.php template file (complete source code) with the following logic:
single.php

get_header();

/* Start the Loop */
while ( have_posts() ) :
    the_post();

    get_template_part( 'template-parts/content/content-single' );

    // ACF - Flexible Content fields.
    $sections = get_field( 'qorp_post_sections' );

    if ( $sections ) :
        foreach ( $sections as $section ) :
            $template = str_replace( '_', '-', $section['acf_fc_layout'] );
            get_template_part( 'flexible-content/sections/' . $template, '', $section );
        endforeach;
    endif;

endwhile; // End of the loop.

get_footer();
The bulk of this logic is referencing other template files, but we’re grabbing our qorp_post_sections and then looping through them and calling separate template files based on which Flexible Content layout is returned.
Here are the template files:
- qorp-theme/flexible-content/sections/call-to-action.php
- qorp-theme/flexible-content/sections/related-posts.php
- qorp-theme/flexible-content/sections/trust-signals.php
All of the source code for the Qorp site is on GitHub. You can also see an example of the final output on Qorp’s site. Also, be sure to check out the final fields (layouts.json) within the qorp-plugin.
ACF’s Flexible Content fields give you the power to offer your clients flexibility for their content, while ensuring they don’t go too far afield from the way their site is supposed to look.
Below 👇 is a video that demonstrates the editorial flow for using these Flexible Content fields.
The Flexible Content field type is arguably one of the most powerful field types in ACF PRO. We’ve seen just how powerful it can be when we looked at how the agency Rareloop uses it to create a page builder experience for their clients.
Supercharge Your Website With Premium Features Using ACF PRO
Speed up your workflow and unlock features to better develop websites using ACF Blocks and Options Pages, with the Flexible Content, Repeater, Clone, Gallery Fields & More.
Related
- Guides: How to Use the Clone Field
- Field Types: Post Object
- Field Types: User
- Guides: How to Use the Gallery Field
- Getting Started: Creating a Field Group

