Overview
For instructions on how to install the ACF PRO plugin, please see this guide.
The methods outlined below will work on any host. In addition, WordPress sites hosted on WP Engine or Flywheel can use the process outlined here.
Method 1: wp-admin upload
- Download Advanced Custom Fields from https://advancedcustomfields.com/latest/.
- Log in to your WP install.
- From the Administration Screen, click on the Plugin menu.
- Under Plugins, click the Add New Plugin sub menu.
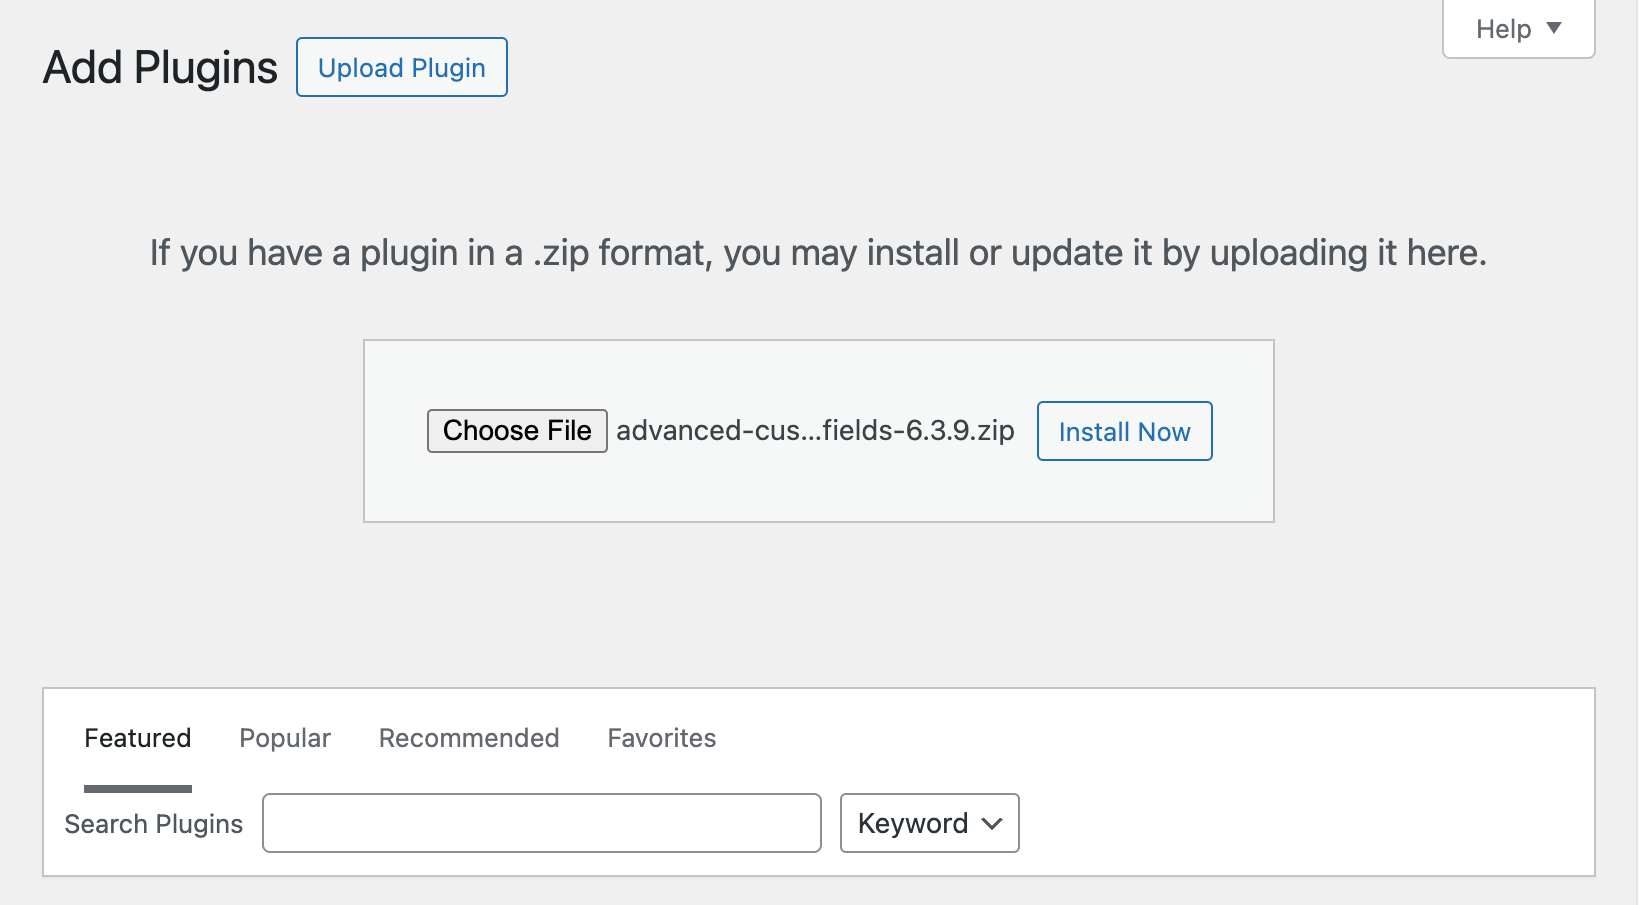
- Click Upload Plugin at the top of the page.
- Click Choose File and select the file you downloaded earlier.

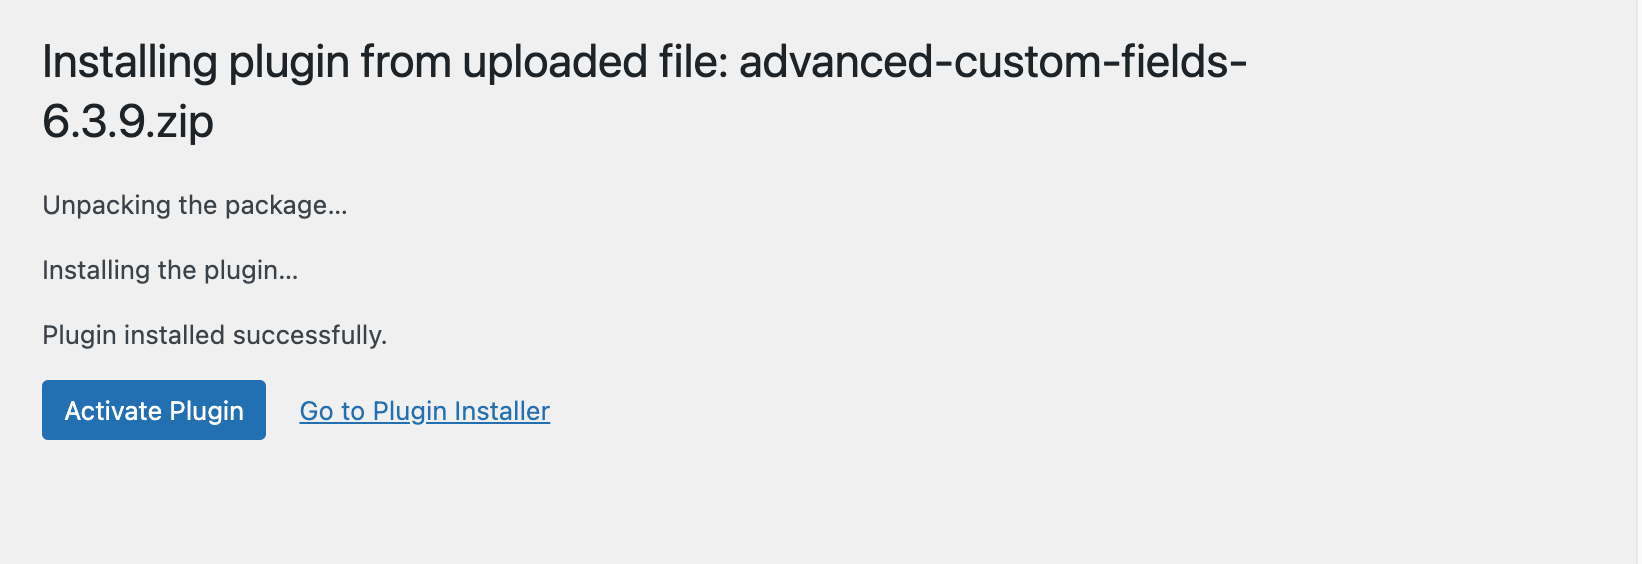
- Click Install Now, and then Activate Plugin.

After installation, you will find a new menu item, “ACF”.
Method 2: FTP
- Download the Advanced Custom Fields plugin.
- Upload
advanced-custom-fieldsto the/wp-content/plugins/directory. - Activate the plugin through the “Plugins” menu in WordPress.
- After installation, you will find a new menu item, “ACF”.
Method 3: WP-CLI
- Open a terminal.
- Navigate to the root of your WordPress install.
- Use the
wp plugincommand to install ACF. - Activate the plugin via WP-CLI or in the WordPress admin.
Make sure to use the commands to install from a local or remote zip file, rather than installing via the plugin’s slug. Installing via the plugin’s slug will not install ACF.
The command below will download the latest version of ACF from our servers and then activate it on your site. To install a local zip file, replace https://advancedcustomfields.com/latest/ with the path to your file.
wp plugin install --activate https://advancedcustomfields.com/latest/
Method 4: Composer
- Add the ACF repository to your
composer.jsonfile."repositories": [ { "type":"composer", "url":"https://composer.advancedcustomfields.com" } ] - From the CLI, require ACF using the following command:
composer require wpengine/advanced-custom-fields
The steps outlined above will install the free version of ACF with Composer. Please see Installing ACF With Composer for more information, including how to use version constraints, installing ACF as a must-use plugin, and customizing install locations.
ACF PRO can also be installed with Composer, as detailed in Installing ACF PRO with Composer.
Installing on WP Engine and Flywheel Hosted Websites
The above methods will work for all WordPress sites. The following steps will also work for WordPress sites hosted on WP Engine and Flywheel.
- Log in to your WP install.
- From the Administration ScreenPanels, click on the Plugins Menu.
- Under Plugins, click the “Add New Plugin” sub menu.
- Search for “Advanced Custom Fields”.
- Find the Advanced Custom Fields plugin by WP Engine in the search results, and click Install.
- Activate the plugin through the “‘Plugins”’ menu in WordPress.
- After installation, you will find a new menu item, “ACF”.
Supercharge Your Website With Premium Features Using ACF PRO
Speed up your workflow and unlock features to better develop websites using ACF Blocks and Options Pages, with the Flexible Content, Repeater, Clone, Gallery Fields & More.
Related
- Getting Started: Installing ACF With Composer
- Guides: How to Update
- Videos: Installing ACF and ACF PRO
- Guides: Upgrade Guide – Version 4
- Getting Started: Installing ACF PRO With Composer

